 |
 |
||||
The plug construction method represented here is not a method used by many however I have used it in the past successfully and have refined it more for this build. Hopefully it will be successful. Each step along the way will have a description, a picture and also running tally on minutes spent working. These maybe useful to myself and other home-builders in the future. ~tb | |||||
To get started I will first answer the most frequent question that most people have asked me: "why have I eleceted to use this method?" I have elected to use this method as I have found through experimentation with models that it has many benefits over strip planking (but not as good as having a CNC machine!). As I hope to illustrate in the time column, I think I can accurately model a hull from a provided set of lines faster this way then with more commonly used methods. Secondly, the plug that results will weigh about 20 pounds. It will be solid and reassuringly heavy to work with and much less fragile than a delicate balsa plug. Finally, demensional stability. Over time, MDF seems to do a better job of holding dimensional accuracy. It shrinks and swells fair LESS than any natural wood. I hope that this allows me to construct a very robust accurate plug that I can keep around for later use if the mold ever needs to be rebuilt. Make sense? Lets get building! |
|||||
| We will begin by first cutting out all the sections for the port half of the boat. Later, we will make a mirrored copy of these sections from these sections such that the port, and starboard side are IDENTICAL and SYMMETRICAL. | |||||
Time |
Time |
||||
| First, take the design and print out the section planform in a one to one scale. The accuracy of this printout will dictate the accuracy of your plug. Number your sections to keep track of them throughout the build. | 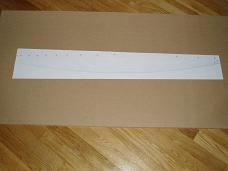 |
||||
| Cut out the first (largest) section. Using a glue stick, carefully glue this section profile down along one of the edges of your board making sure it is straight and true. The glue will just hold the template in place long enough to trace and should never dry. Between cutting and glueing, this should take about 2 minutes per section. I have 10 sections per half, so 20 minutes. | 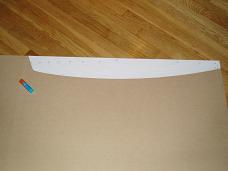 |
||||
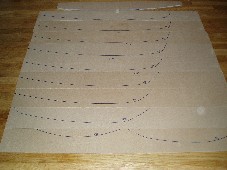
| Carefully trace the outline of the template with a permenant marker and remove the paper template. You can now cut this template down to be the next smaller template (I used each piece of paper3 times before throwing it out. The first one made sections 1,4 and 4, the second made 2,5 and 8 and so on) Repeate for each section. Half a minute per section, with 10 sections per half, so 5 minutes. Note again that I have numbered the section to keep track of it. This is my section number 3. | 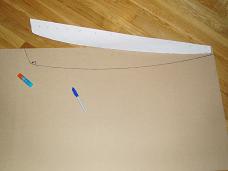 |
||||
| With a Jig saw (or similar) carefully saw along the lines that you have traced. Ideally you want to cut right on your line as this line was actually drawn larger than te desired shape in earlier steps. Takes about 5 minutes per section to do well, so 50 minutes total for this half | Sorry, no picture of this. possibly one here in the future. | ||||
| If you have not managed to saw directly on the line, or were just playing it cautious with the saw, you should now take a sanding block with 100 grit sandpaper and sand the sections down until you have just barely sanded completely through your traced line (in my case, I want it so I just see a VERY small line of blue remaining from my marker line). | Sorry, no picture of this. possibly one here in the future. | ||||
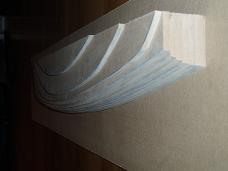
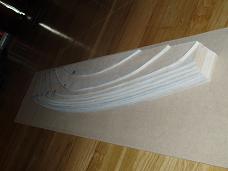
| With these steps completed, if you stack up all of your sections, you should be able to get an early glimpse of the shape of the port side of the boat in a very rough state. |  |
||||
 |
 |
 |
|||
| Thus far things have been progressing smoothly. The quarter inch MDF has been cutting well and shaping well with the 100 grit sand paper. Based on the tests I have done on scrap pieces and off cuts, fairing all these sections together should be relatively painless. ~tb 11.07.2003 |
|||||
Section 2: Plug Construction part 2, the starboard half. | |||||
| Using the sections created in Section 1, we will make mirrored copies of each of them such that we have identical(y mirrored) port and starboard halfs. | |||||
Time |
Time |
||||
| Take the sections you have already cut out, and flip them over. Now you can trace the outline onto a fresh piece of wood. 1 minute per piece, 10 pieces. | 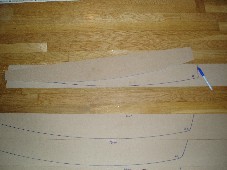 |
 |
|||
| As before, with a Jig saw (or similar) carefully saw along the lines that you have traced. Ideally you want to cut right on your line as this line was actually drawn larger than te desired shape in earlier steps. Takes about 5 minutes per section to do well, so 50 minutes total for this half | Sorry, no picture of this. possibly one here in the future. | ||||
| If you have not managed to saw directly on the line, or were just playing it cautious with the saw, you should now take a sanding block with 100 grit sandpaper and sand the sections down until you have just barely sanded completely through your traced line (in my case, I want it so I just see a VERY small line of blue remaining from my marker line). | Sorry, no picture of this. possibly one here in the future. | ||||
| To ensure that any starbord section matches its port counterpart, take each set of sections, line them up, clamp them together, and then sand the cut edge till they are both the same perfect shape. 2 minutes per pair, 10 pairs. |  |
||||
| As before, one can now stack all the pieces up and get yet another early glimpse of the shape. |  |
||||
Section 3: Plug Construction part 3, joining and fairing sections. | |||||
| Using the sections created in Section 1 and 2, we will finally start to work on something that looks like a hull. | |||||
Time |
Time |
||||
| If everything looks right, go ahead and with a high grade wood glue, glue together the port and starboard halves making sure to carefully line each section up as you glue. When things are lined up, clamp tight and hold till glue has set (overnight). | 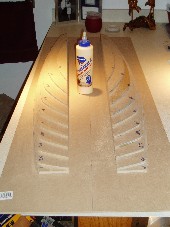 |
||||
| In this seemingly worthless step (which will make sense later) paint the outer surface of the plug halves with a spray paint of contrasting color. I used white as I had some left over from another project. Let dry. |  |
||||
| Sanding! and lots of it. In this picture you can see that the sanding block is longer enough such that it is ALWAYS on atleast 2 (if not 3) of the sections. This is immportant such that becomes difficult to oversand and develop low spots that will be difficult to fix. | 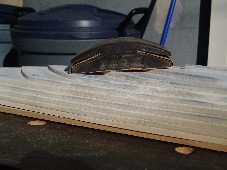 |
||||
| As you begin to sand, the purpose of the paint will become evident. Any place you see paint, you need to sand more. When you dont see paint anymore STOP SANDING THAT AREA! Total sanding time, 1 hour per half hull, 2 hours total. | 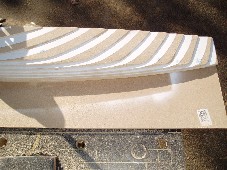 |
||||
| With the two halves most of the way sanded, carefully align and join the two halves. Clamp them together and let glue set overnight. | sorry no picture | ||||
| When the glue has dried, carefully sand the two halves where they meet to eleminate any glue that has squeezed out. This shape should be an accurate copy of the model and is now ready for surface preperation. Pictured to the left is last years boat. Different shape, different plug technique. | 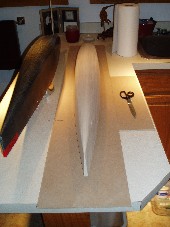 |
||||
| Important lesson learned!!!! I thought I had a better I and sense of feel than trusting what the paint showed as areas that needed more sanding. . . When I checked the plug with a pair of callipers, I found that the paint was right, and I was wrong. In the future, I will always trust the paint marks! Other lesson learned. I used the hand sanding block to start sanding to break down the rough edges, and then switched to a random orbital sander for the medium work, and then finished by hand. I would highly reccomend this approach for speed and accuracy without damaging anything! ~tb 11.07.2003 |
|||||
| Though this work is done, Im out of time to write HTML pages, so you will have to wait to catch up on progress! Rather than wasting your time finishing a plug, for small "production volumes", please skip to section #4 Part Fabrication without a mold! | |||||
Time |
Time |
||||
"The German Rubber Method" | |||||
Time |
Time |
||||
| Jim Linville and Hal Robinson of the Minuteman Model Yacht club came across this method for making sailboat models off of "unfinished" plugs. The club uses this method extensively in developping new boats in the one meter class. I hope to develop a tutorial here soon showing this method, but in the mean time, please proceed to the method as illustrated by a member of the Greater Hartford Model Yacht club. To purchase the supplies needed to use this method please visit the MMYC boat building links page | |||||